This post provides a simple tutorial for creating a stitched and glued bangle bracelet for competitive ballroom dancers.
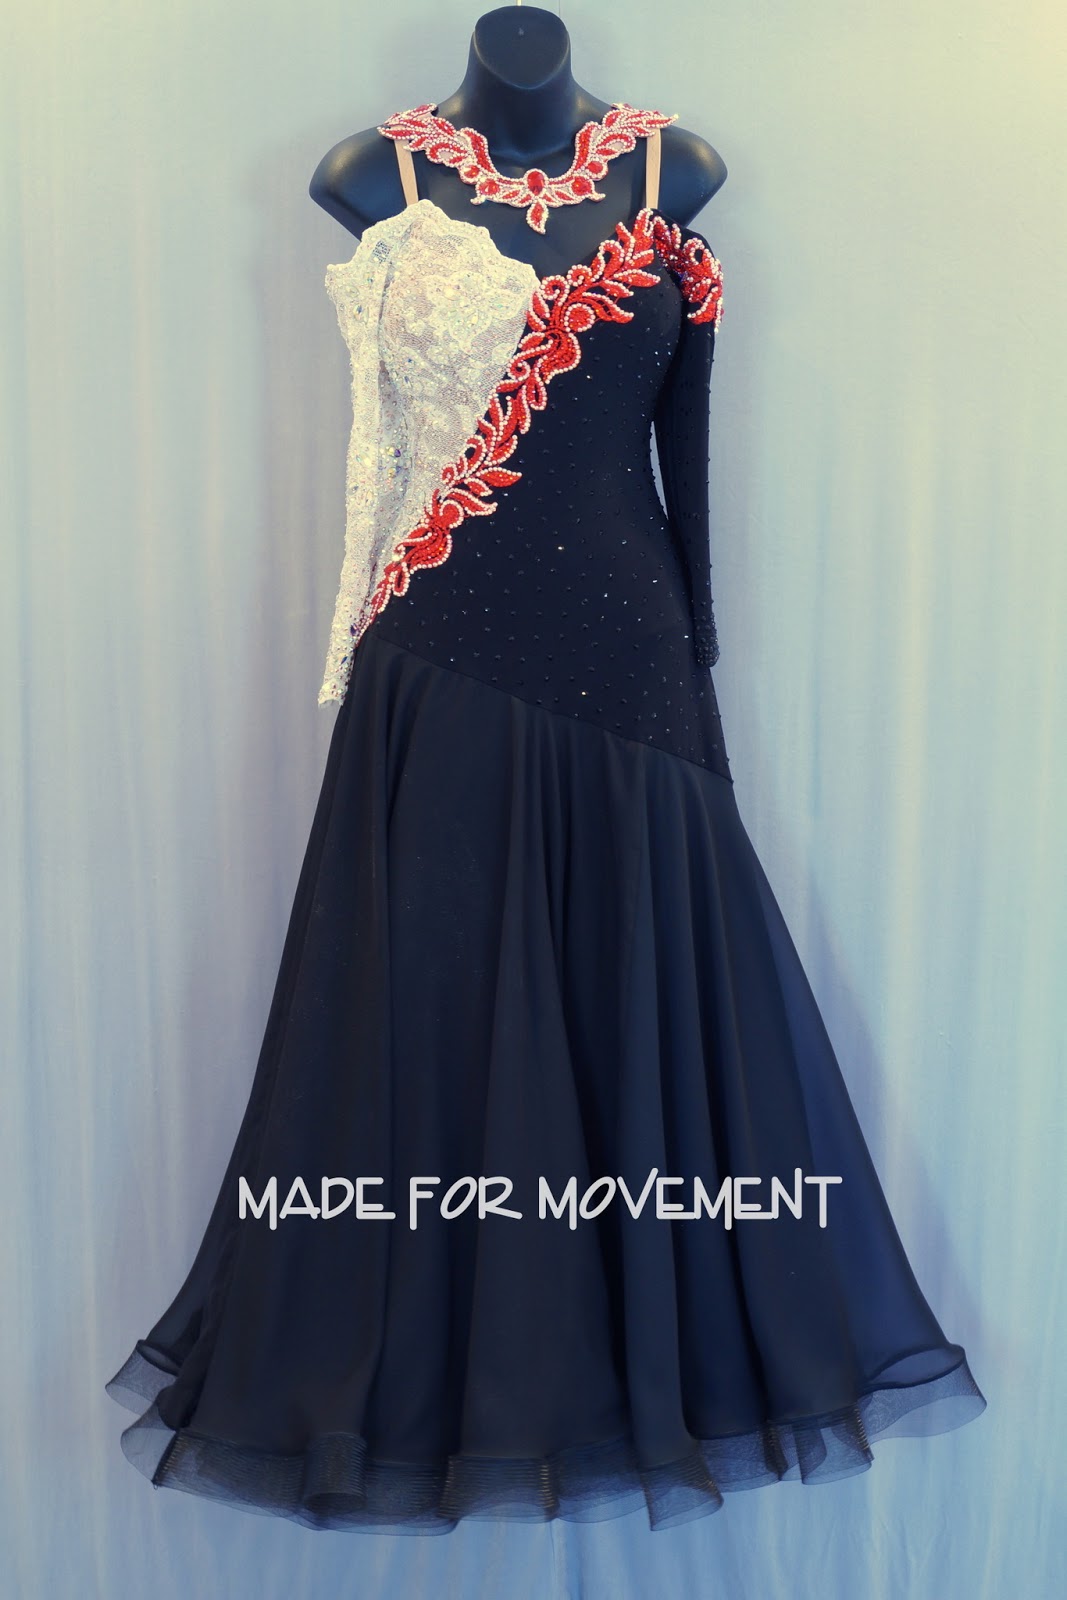
Jewelry with prong settings can catch in fine knit fabrics, styled hair, lightweight chiffons and georgettes, lace, and even the wool crepe or stretch knit of a partner's sleeve, so usually, competition jewelry is made in the same way costumes are, by using adhesive instead of prongs to attach Swarovski sparkle. Another advantage to this particular bangle is that is can flex a little without problems, good for dancers and wrist connections as well.
To make this bangle, you will need Rigilene boning, 1 1/4" binder clips, and E-6000 adhesive to begin. In the USA, Rigilene is produced by Dritz and is called Flexicurve Polyester Boning, available in most fabiric stores. I used the 1/2" width. It comes in both black and white, but I only use the black for black bangles, and white for all colors.

You will also need stretch mesh in the color of your bangle, and Swarovski (or your brand of choice) flatback crystals to apply. You can use a nude mesh for any color, but I think the results are much nicer with colors if the mesh matches the stone. Nude looks great with Crystal AB. I use GemTac to apply my crystals. You will need a sewing machine, some skill with it, basic dressmaking tools, patience, and courage. We'll talk about each tool and supply as its use is demonstrated.

One of the benefits of making these bangles for yourself is the possibility to customize them to your size. I am very small boned, so mine would be smaller than what is commonly made to be sold at competitions.
Measure around the widest part of your hand, with your thumb tucked snugly against your fingers. Safety pin the tape measure to the measurement you get, and test to make sure you can squeeze your hand into the loop. My inside bangle measurement would be 7 1/4", but today I am making bangles for a client with a larger hand. Her inside bangle measurement is 8 3/4". My client would not be able to put my bangle on, and her bangle would fly off on hand in movement. Custom fit is a great thing!

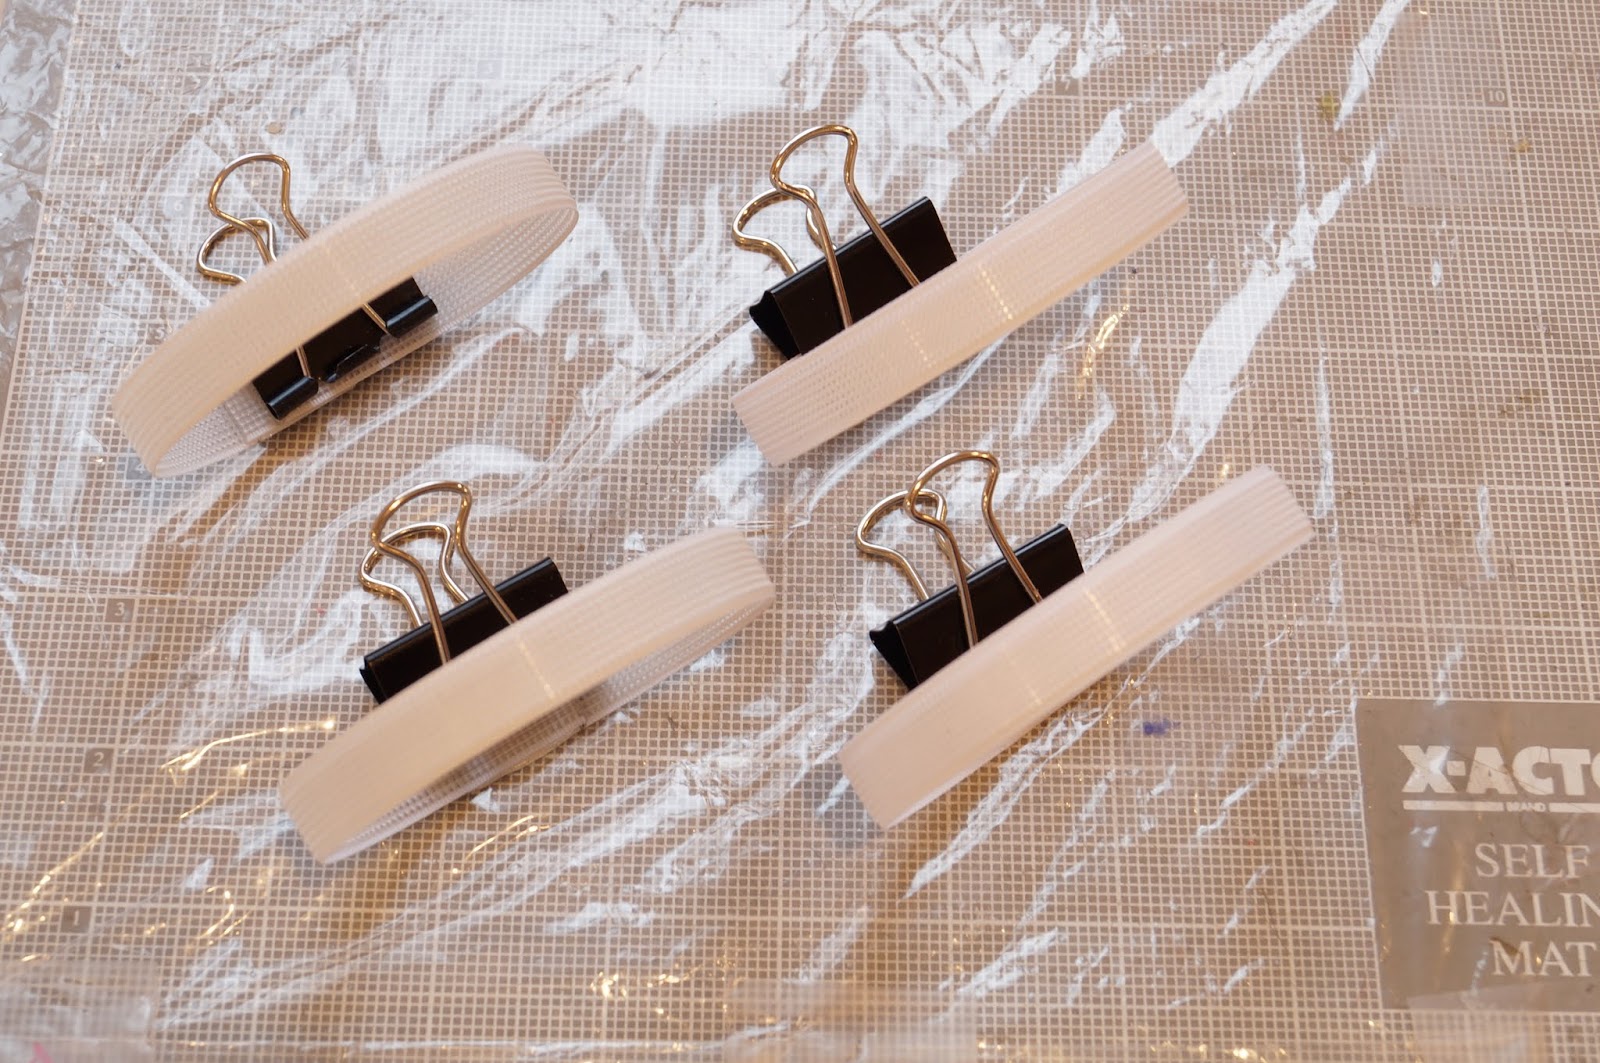
I measure out the Rigilene, on the inside of it's curve, and make a pencil mark at the intended size, and another 3/4 larger than that size mark. So, for my client, I marked at 8 3/4" and at 9 1/2". I cut at the 9 1/2" mark with craft scissors, and made three more, with a plan for Henry Ford assembly line efficiency.

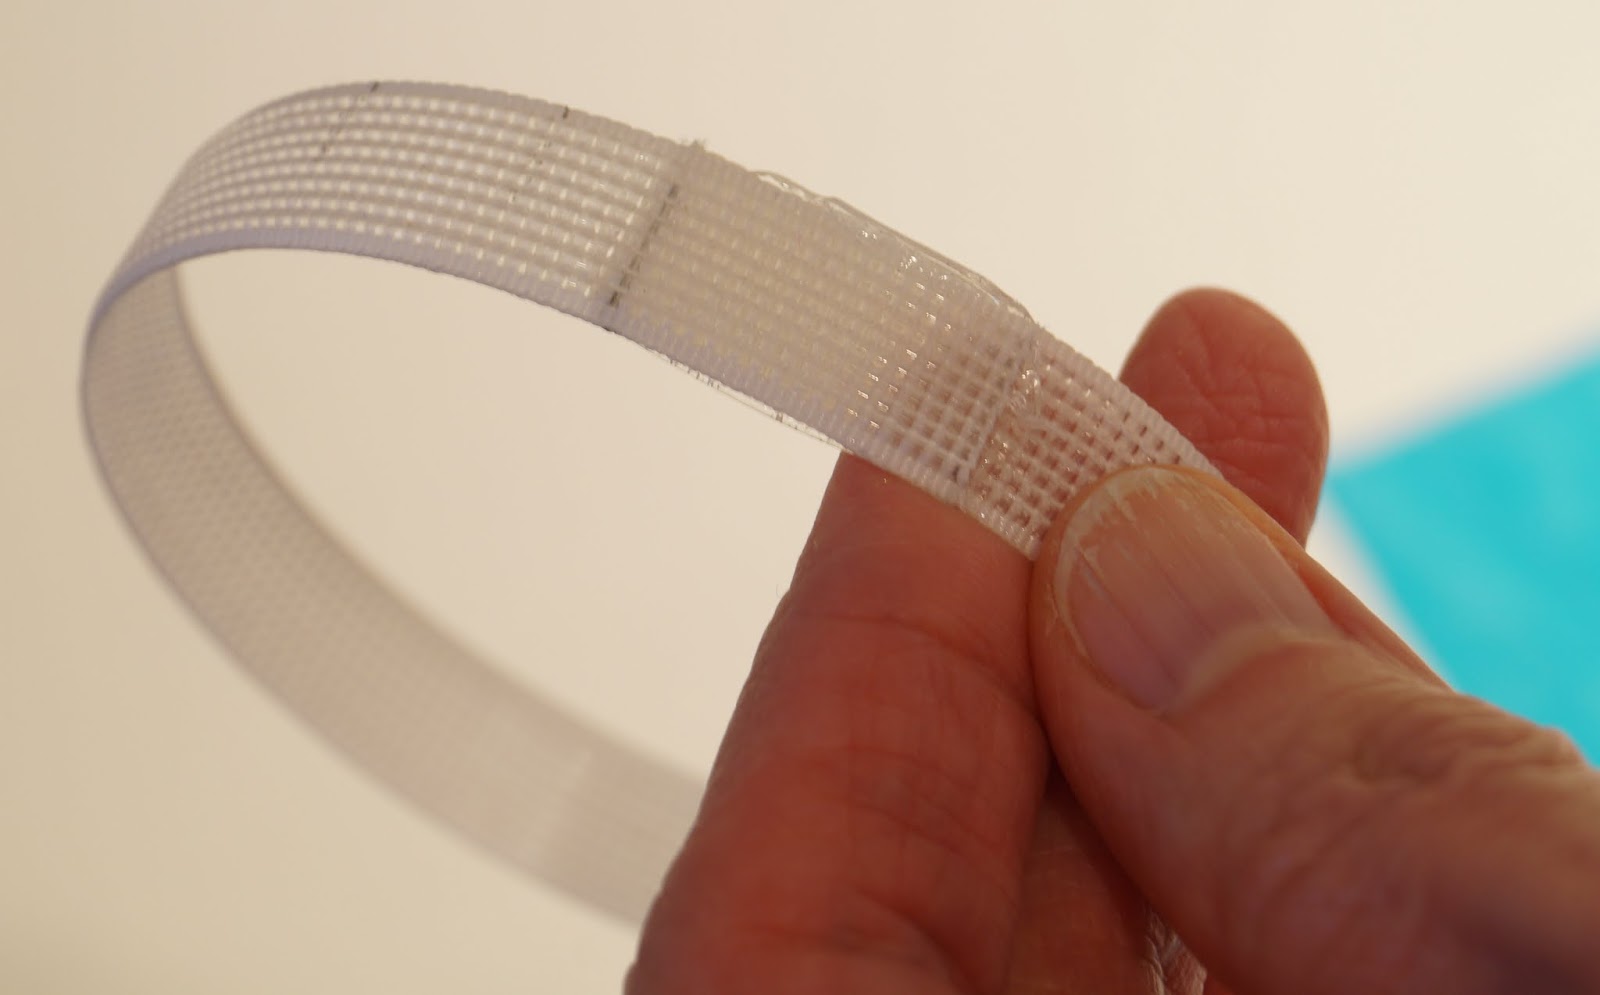
With my binder clips at the ready, I apply E-6000 between the mark and the end of the Rigilene, curl it into a bangle, and put on the clip to hold it in place to dry. Do the best possible alignment job you can. It helps to have a third hand to apply the clamp, although its possible to do it by yourself.

Do not worry if some adhesive squeezes out. Better a little too much than a starved and weak bond.

Take your bangle base(s) (because 4 or 6 or 8 or 10 are way more fun than one) to a place far away from you and your pets to fully cure. E-6000 fumes are carcinogenic. I have worked with it for 28 years, with a very healthy respect, but it is not something you want to breathe for extended periods. I put mine in my basement bathroom, with the door shut and exhaust fan on, for several hours, and then let them finish curing there overnight. Open the clip too soon, and the bond will not hold.


Starting at the mesh overlap, stitch all the way round the inside of the bangle, about 1/8" from the edge. You should have about 1/2 inch of mesh to hang onto and keep the mesh gently stretched around the bangle form.

A little puckering is hard to avoid, but bigger problems should be ripped out and redone.

Then trim away the excess mesh with good trimming scissors, as near to the stitching line as possible, but don't cut the mesh beneath.


You could also use the applicator tip on the bottle of GemTac, but make sure the hole you cut is small if you try to do this. Apply enough glue to squeeze out slightly around the crystal, but not excessively so. Make dots and not stripes of adhesive, for the greatest flexibility of the finished bangle, and to avoid crystals popping off.


I was replacing four missing bangles for a client of mine, and this is the complete set, plus a pair of earrings.

There are a multitude of other possible flatback crystal arrangements for these bangles, but big sew-on jewels do not work well over the curves. Here are four other possibilities, from the upper left clockwise, 1) staggered ss20, 2) ss20 with ss30 in the middle, 3) ss16 with ss34 in the middle, and 4) ss16 with ss40. You can experiment and make up your own arrangements, calculating for 1/2" of width.

Enjoy your bangle making and please tag me (Marsha Wiest-Hines) on facebook to show me your beautiful bangles! You are free to use this bangle tutorial to make bangles for yourself, but please do not copy and distribute my tutorial, or teach it, as that would constitute violation of my text and image copyright.
Jewelry with prong settings can catch in fine knit fabrics, styled hair, lightweight chiffons and georgettes, lace, and even the wool crepe or stretch knit of a partner's sleeve, so usually, competition jewelry is made in the same way costumes are, by using adhesive instead of prongs to attach Swarovski sparkle. Another advantage to this particular bangle is that is can flex a little without problems, good for dancers and wrist connections as well.
To make this bangle, you will need Rigilene boning, 1 1/4" binder clips, and E-6000 adhesive to begin. In the USA, Rigilene is produced by Dritz and is called Flexicurve Polyester Boning, available in most fabiric stores. I used the 1/2" width. It comes in both black and white, but I only use the black for black bangles, and white for all colors.

You will also need stretch mesh in the color of your bangle, and Swarovski (or your brand of choice) flatback crystals to apply. You can use a nude mesh for any color, but I think the results are much nicer with colors if the mesh matches the stone. Nude looks great with Crystal AB. I use GemTac to apply my crystals. You will need a sewing machine, some skill with it, basic dressmaking tools, patience, and courage. We'll talk about each tool and supply as its use is demonstrated.

One of the benefits of making these bangles for yourself is the possibility to customize them to your size. I am very small boned, so mine would be smaller than what is commonly made to be sold at competitions.
Measure around the widest part of your hand, with your thumb tucked snugly against your fingers. Safety pin the tape measure to the measurement you get, and test to make sure you can squeeze your hand into the loop. My inside bangle measurement would be 7 1/4", but today I am making bangles for a client with a larger hand. Her inside bangle measurement is 8 3/4". My client would not be able to put my bangle on, and her bangle would fly off on hand in movement. Custom fit is a great thing!

I measure out the Rigilene, on the inside of it's curve, and make a pencil mark at the intended size, and another 3/4 larger than that size mark. So, for my client, I marked at 8 3/4" and at 9 1/2". I cut at the 9 1/2" mark with craft scissors, and made three more, with a plan for Henry Ford assembly line efficiency.

With my binder clips at the ready, I apply E-6000 between the mark and the end of the Rigilene, curl it into a bangle, and put on the clip to hold it in place to dry. Do the best possible alignment job you can. It helps to have a third hand to apply the clamp, although its possible to do it by yourself.

Do not worry if some adhesive squeezes out. Better a little too much than a starved and weak bond.

Take your bangle base(s) (because 4 or 6 or 8 or 10 are way more fun than one) to a place far away from you and your pets to fully cure. E-6000 fumes are carcinogenic. I have worked with it for 28 years, with a very healthy respect, but it is not something you want to breathe for extended periods. I put mine in my basement bathroom, with the door shut and exhaust fan on, for several hours, and then let them finish curing there overnight. Open the clip too soon, and the bond will not hold.
While the adhesive is curing, cut 2" wide strips of your stretch mesh, at least an inch longer than your bangle measurement. You must cut these along the lengthwise grain of the mesh, parallel to the selvedge edge of the fabric. The little honeycomb openings align along the lengthwise grain. I'll enlarge it below so you can see what I mean. Stretch mesh is available from any of the Ballroom fabric providers in England, but a good USA source is Spandex House in NYC. Order at least 1/4 to 1/3rd yard of each color you need, depending on the size of your wrist. You need a lengthwise strip at least 8.5" long for the smallest of wrists. There is a minimum order of $20 at Spandex House.

I draw lines to cut along, with pencil or colored pencil. I made my strips 10" long. You will trim away excess, so a little too long is better than too short.

OK... WE AGREE IT IS THE NEXT DAY, RIGHT??? AND THE E-6000 HAS CURED FULLY.
Take off your clips, and if there is any glue ooze...

Trim it away. If you have an imperfect bond, you can machine stitch it to reinforce it, but if it will hold together through construction, three lines of machine stitching will secure it permanently.
You need to find out which way your mesh strip edges will curl by gently stretching it. You want it curling up, toward you and not down and away.

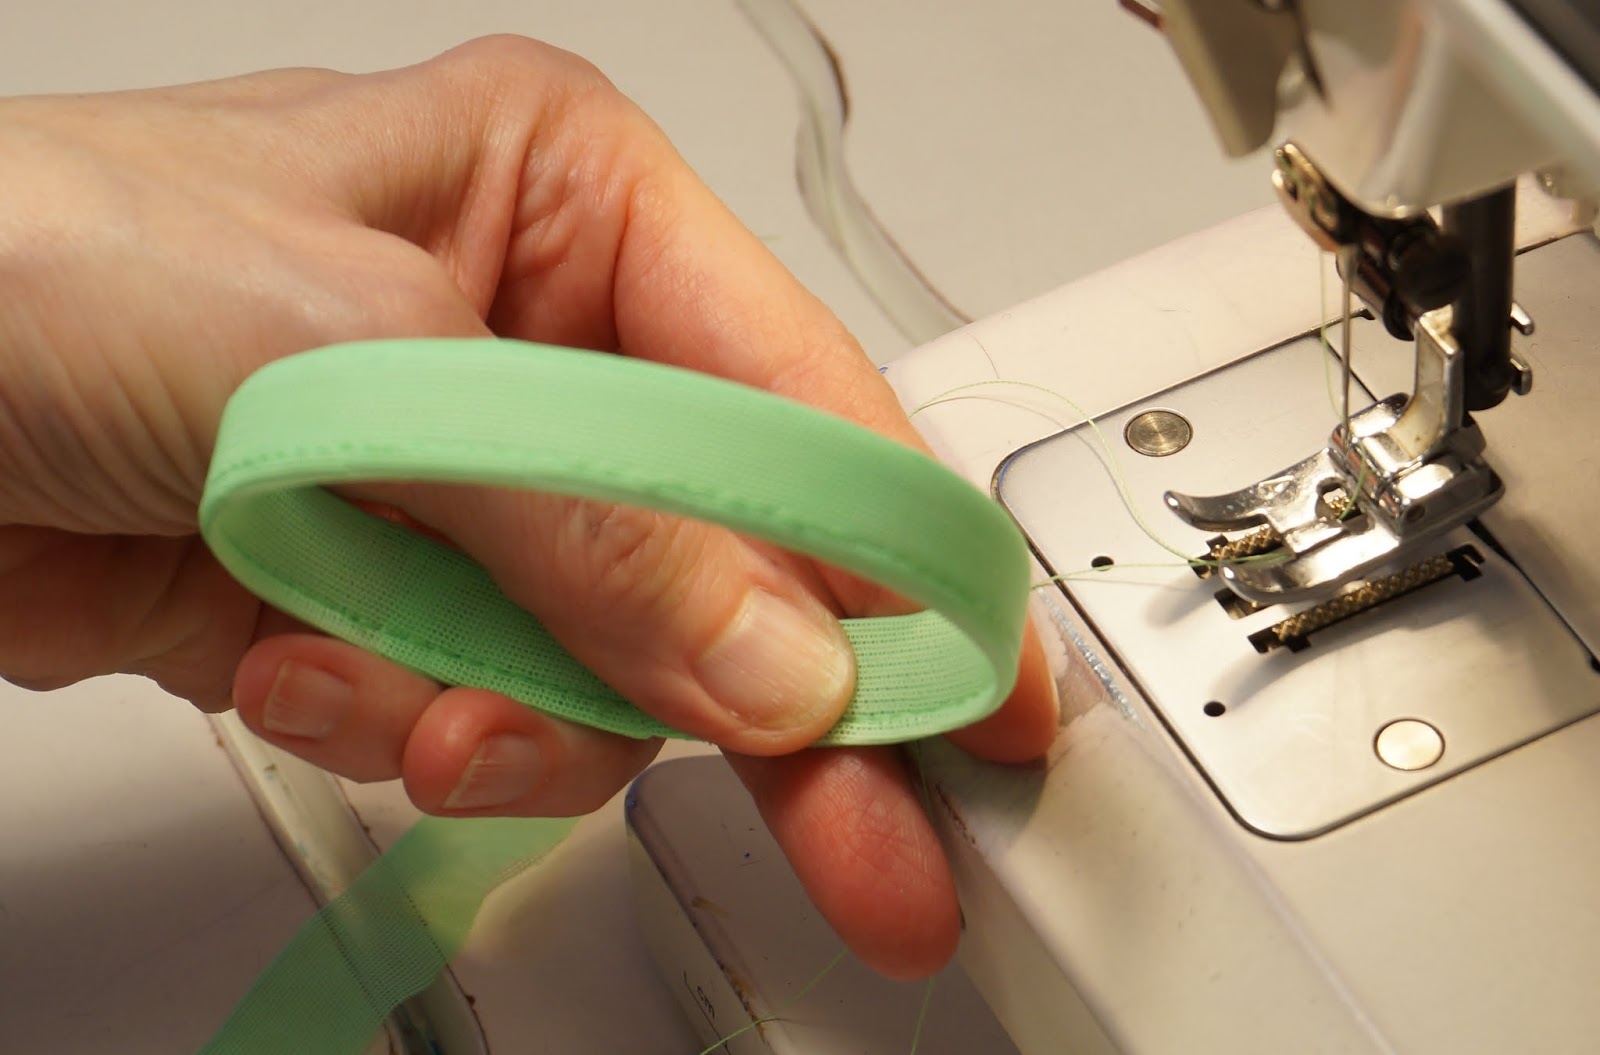
Thread your machine in a thread color matching your mesh. You need a medium sized needle, (I use a Schmetz 12) and a normal length straight stitch, about 12 stitches per inch. Place the join of the Rigilene about 1/4" ahead of the end of the strip, and put it under your pressure foot, aligning the mesh so just a tiny bit of the color is visible. Sometimes I baste the mesh in place to get a clean start, and sometimes I backstitch to the back edge, like I did here.
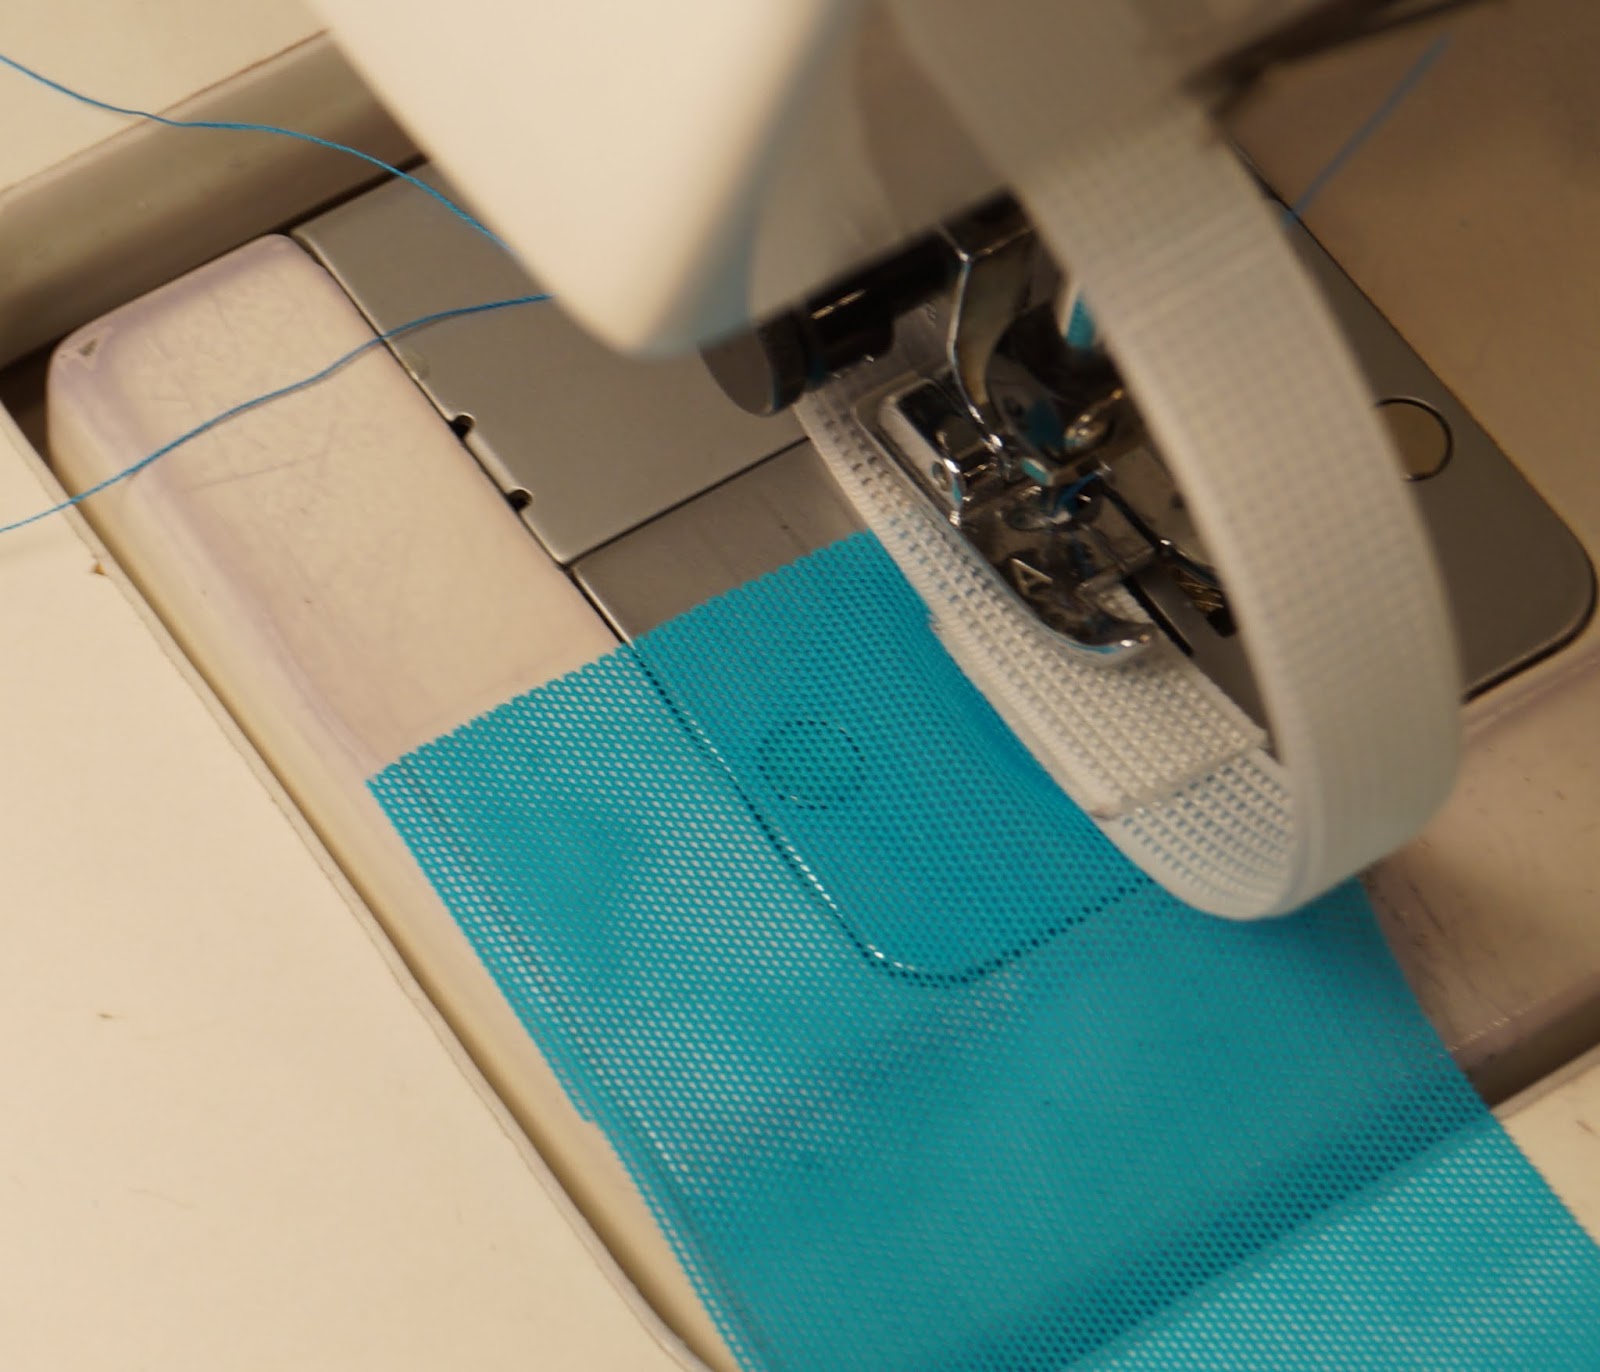
And from the other side, so you can see how to get the Rigilene under the foot. The Rigilene loop will probably not fit easily under your machine housing, and will squash a bit. Below I am about half way around the bangle. I stretch the mesh just a little bit (and control its placement) with my right hand, while controlling the Rigilene and guiding it through the machine with my left.

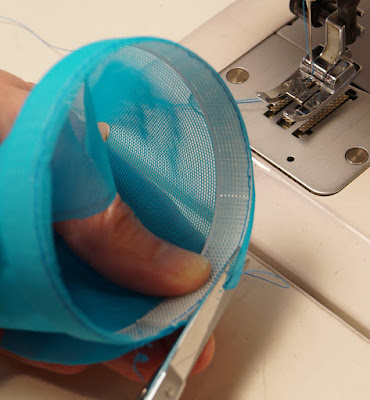
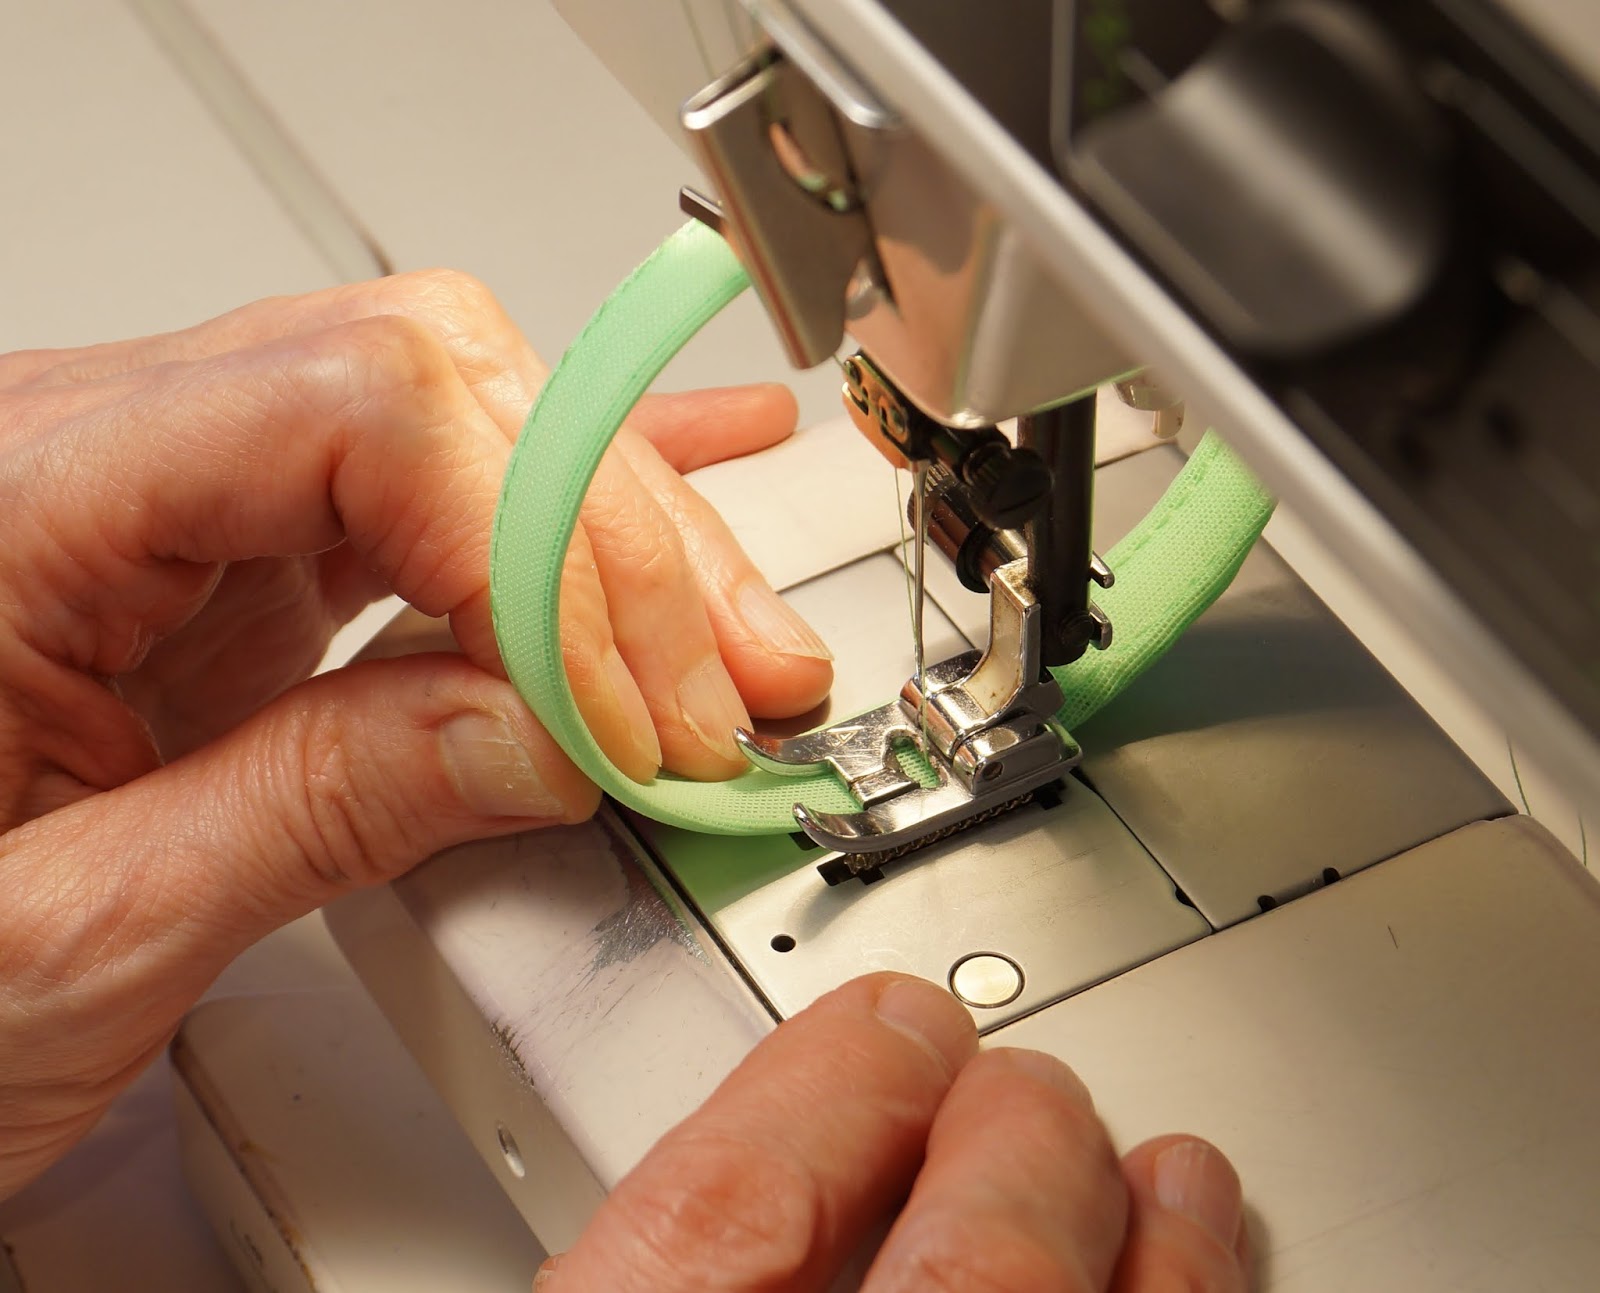
Stitch all the way around the inside of the bangle form, with the edge of the mesh
sticking out about 1/8" so you are sure you are catching it with your line of stitching.
Continue stitching to about 1/4" past the thick join, and back stitch.

Then trim away the excess mesh length.

Also trim away the tiny bit that sticks over the edge of the Rigilene, careful not to trim the Rigilene.

Now fold the mesh around the inside of the Rigilene, and back across the outside. You will have one layer of mesh on the inside of the bangle form, and two on the outside, with double that at the join to protect you from any sharp edges and bits of poly cord in the Rigilene.

Sometimes, I hand baste the overlap here, to get a clean start with the machine.
Keep your grain running straight around the bangle.

Starting at the mesh overlap, stitch all the way round the inside of the bangle, about 1/8" from the edge. You should have about 1/2 inch of mesh to hang onto and keep the mesh gently stretched around the bangle form.


Then trim away the excess mesh with good trimming scissors, as near to the stitching line as possible, but don't cut the mesh beneath.

It should look like this!
Then stitch the other edge in the same place, again from the inside of the bangle.
That completes the form. Now it's time for the sparkle!
You will need ss16 crystals if you embellish your bangle just like mine. There are multiple possibilities, and I'll show you some others at the end of the post. This size fits neatly 3 across the bangle for the look of pave. It takes about 6 to 6.5 rows of 3 stones for each inch of your bangle, so you will need at least 18 ss16 flatbacks for each inch of the outside dimension of your bangle. This will be WAY bigger than you think, so measure first. My 8 3/4" bangle has an outside circumference of 9 3/8". This is why we use MESH, and not Lycra, which would both make the outside huge and lumpy, as well as making the inside considerably smaller than you want it to be. Two of my bangles took 165 crystals, and two of them took 168. Better to have a few too many than not enough.

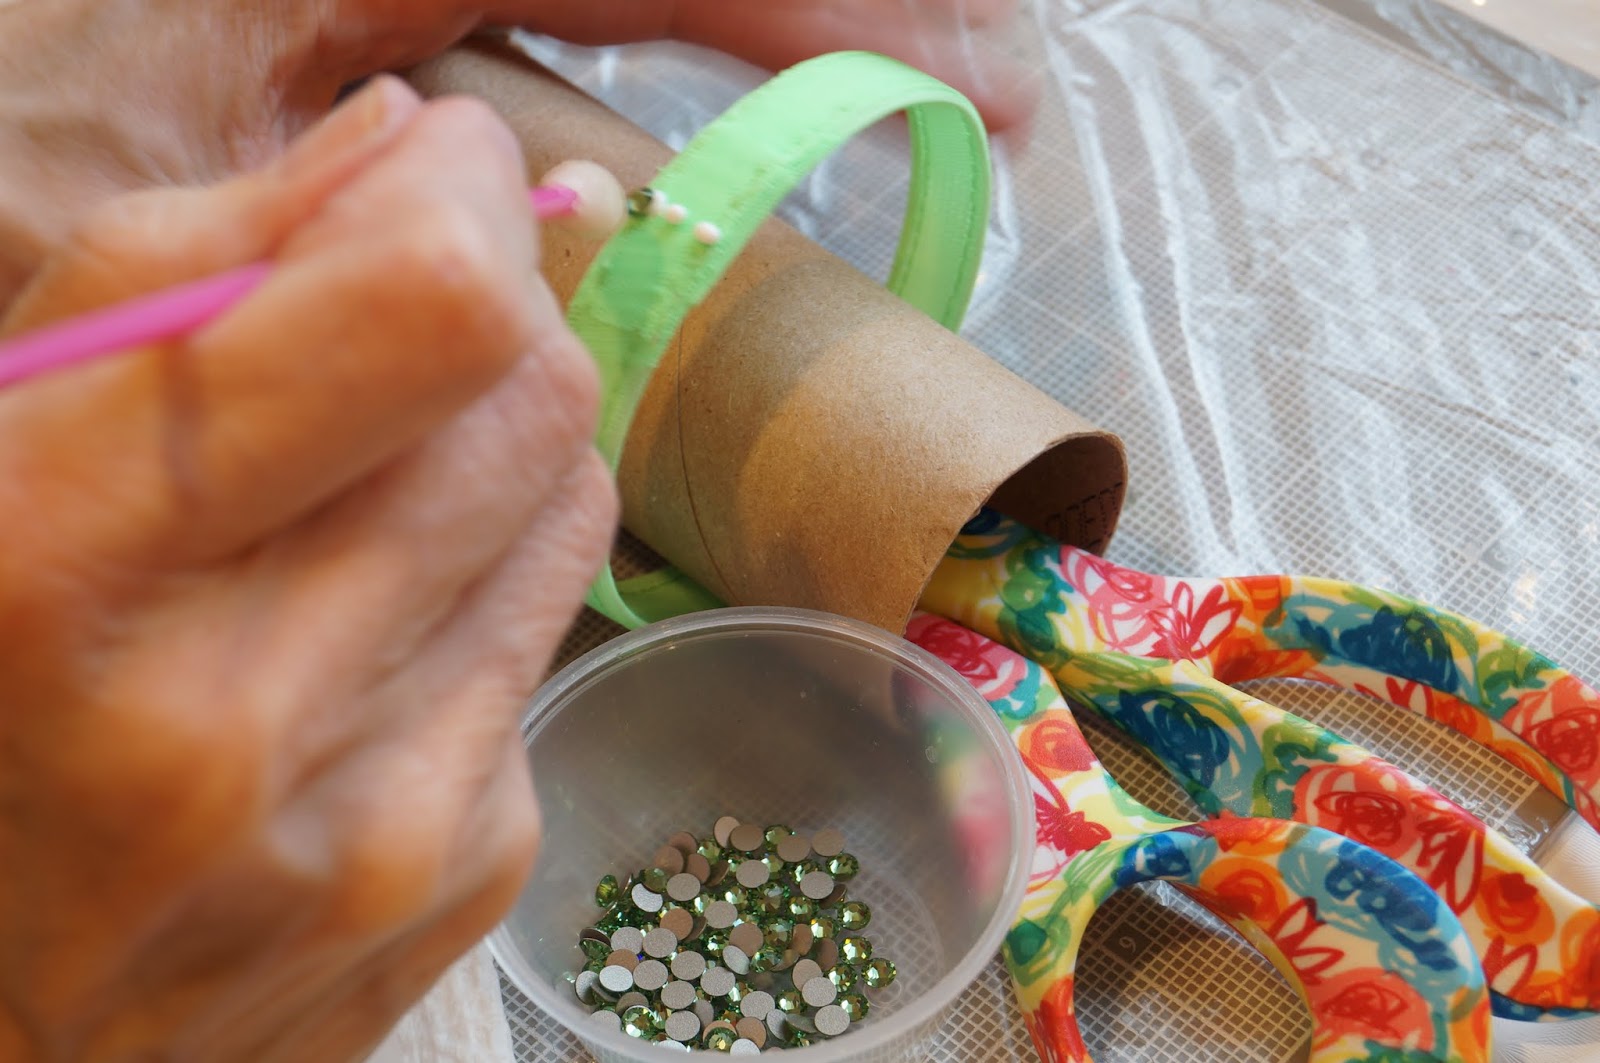
I put my bangle on a cardboard tube, weighted with my craft scissors (or sometimes my GemTac bottle) for easy and continuous embellishing. Make sure all your thread ends are neatly trimmed before you begin, or they will hold your stones up and out of place.


I use a syringe to apply my glue. Fill it only when the barrel is empty,
and not ever more than half full.

Squeeze the adhesive in, put in the plunger, and let the glue run down toward the plunger
before you push out all the air to prime the syringe.

You could also use the applicator tip on the bottle of GemTac, but make sure the hole you cut is small if you try to do this. Apply enough glue to squeeze out slightly around the crystal, but not excessively so. Make dots and not stripes of adhesive, for the greatest flexibility of the finished bangle, and to avoid crystals popping off.
I begin at the middle of the join, with a row of three dots, just to calibrate my eyes and fingers. I use a Pick N Stick to transfer my crystal to the bangle, but there are many possible application tools available.
After my first row is on, and straight across the bangle, (make any necessary adjustments in placement with the wrong end of the application tool) I apply 6 or nine dots of glue at once and then put in the crystals. I make sure the crystals line up both horizontally and vertically. I gently rotate the bangle away from me, and by the time the first crystals are ready to go under the tube, they are generally cured enough not to be damaged by the gentle weight of the tube and scissors. I am careful not to drag them against my work surface, carefully lifting and placing the finished portion of the bangle. I often put many bangles on my tube at once, but I just did the one here for clarity in demonstration. Doing more than one bangle at a time, the additional work gives the crystal adhesive even more cure time.

At the end, you can spread out the crystals a little if necessary to fill the space. A little further apart is no problem, but crystals lapping over each other are both unsightly, and likely to catch on things and come off. I usually make a line of crystals along one edge when I am about an inch from the starting point, to determine how many rows are necessary to finish. Then I fill in each row, as on the turquoise bangle below.

After your bangle has a full 24 hours to achieve a complete cure, BRAVO! You did it!

I was replacing four missing bangles for a client of mine, and this is the complete set, plus a pair of earrings.

There are a multitude of other possible flatback crystal arrangements for these bangles, but big sew-on jewels do not work well over the curves. Here are four other possibilities, from the upper left clockwise, 1) staggered ss20, 2) ss20 with ss30 in the middle, 3) ss16 with ss34 in the middle, and 4) ss16 with ss40. You can experiment and make up your own arrangements, calculating for 1/2" of width.

Enjoy your bangle making and please tag me (Marsha Wiest-Hines) on facebook to show me your beautiful bangles! You are free to use this bangle tutorial to make bangles for yourself, but please do not copy and distribute my tutorial, or teach it, as that would constitute violation of my text and image copyright.